Creating an OAuth 2.0 application
Before using OAuth 2.0 to integrate with the Lumin APIs, you need to register your application in the Lumin Developer settings page.
Prerequisites
- You must be a Workspace Owner to create integration apps.
- Each Workspace can create up to 5 integration apps.
Step-by-step walkthrough
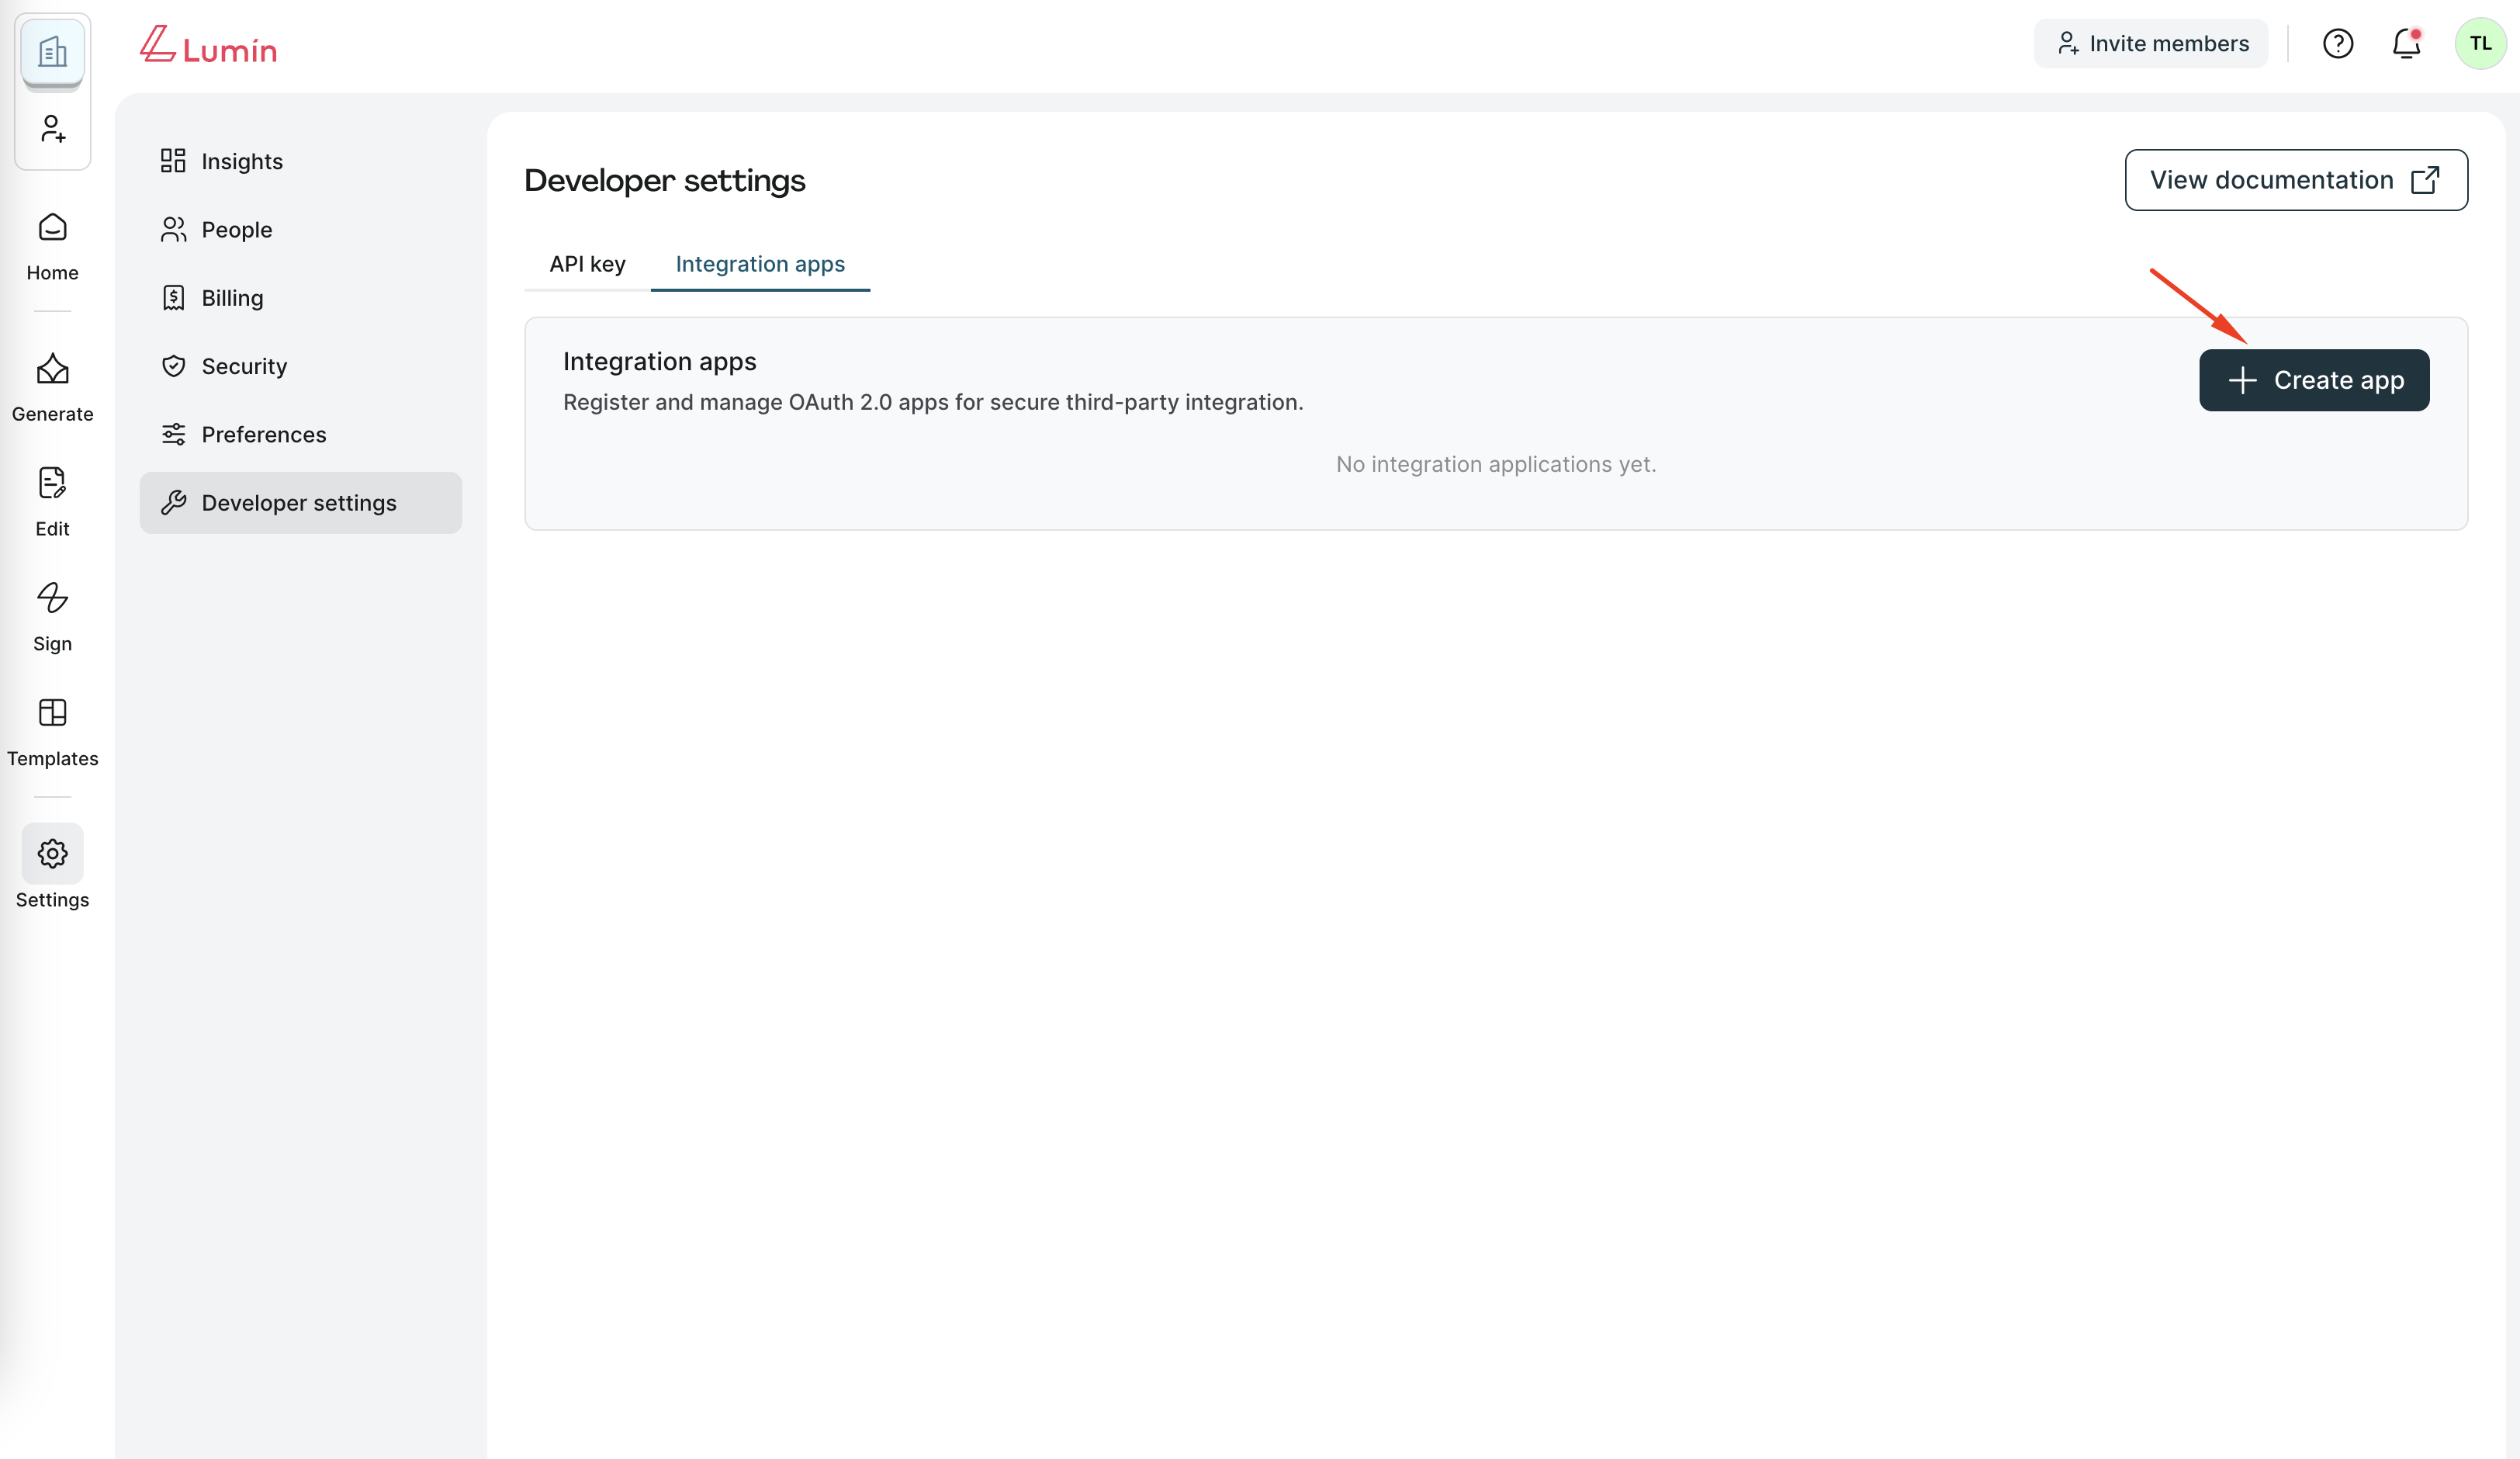
Step 1: Navigate to Developer settings page
- Log in to your Lumin account.
- Go to Settings → Developer settings → Integration apps.
- Click Create app.
Step 2: Enter basic information
On the "Create an application" page, fill out the following fields:
- Application name: A name to identify your app internally.
- Application type: Choose whether your app is a Public Application (no client secret, uses PKCE) or a Private Application (server-based, with client secret).
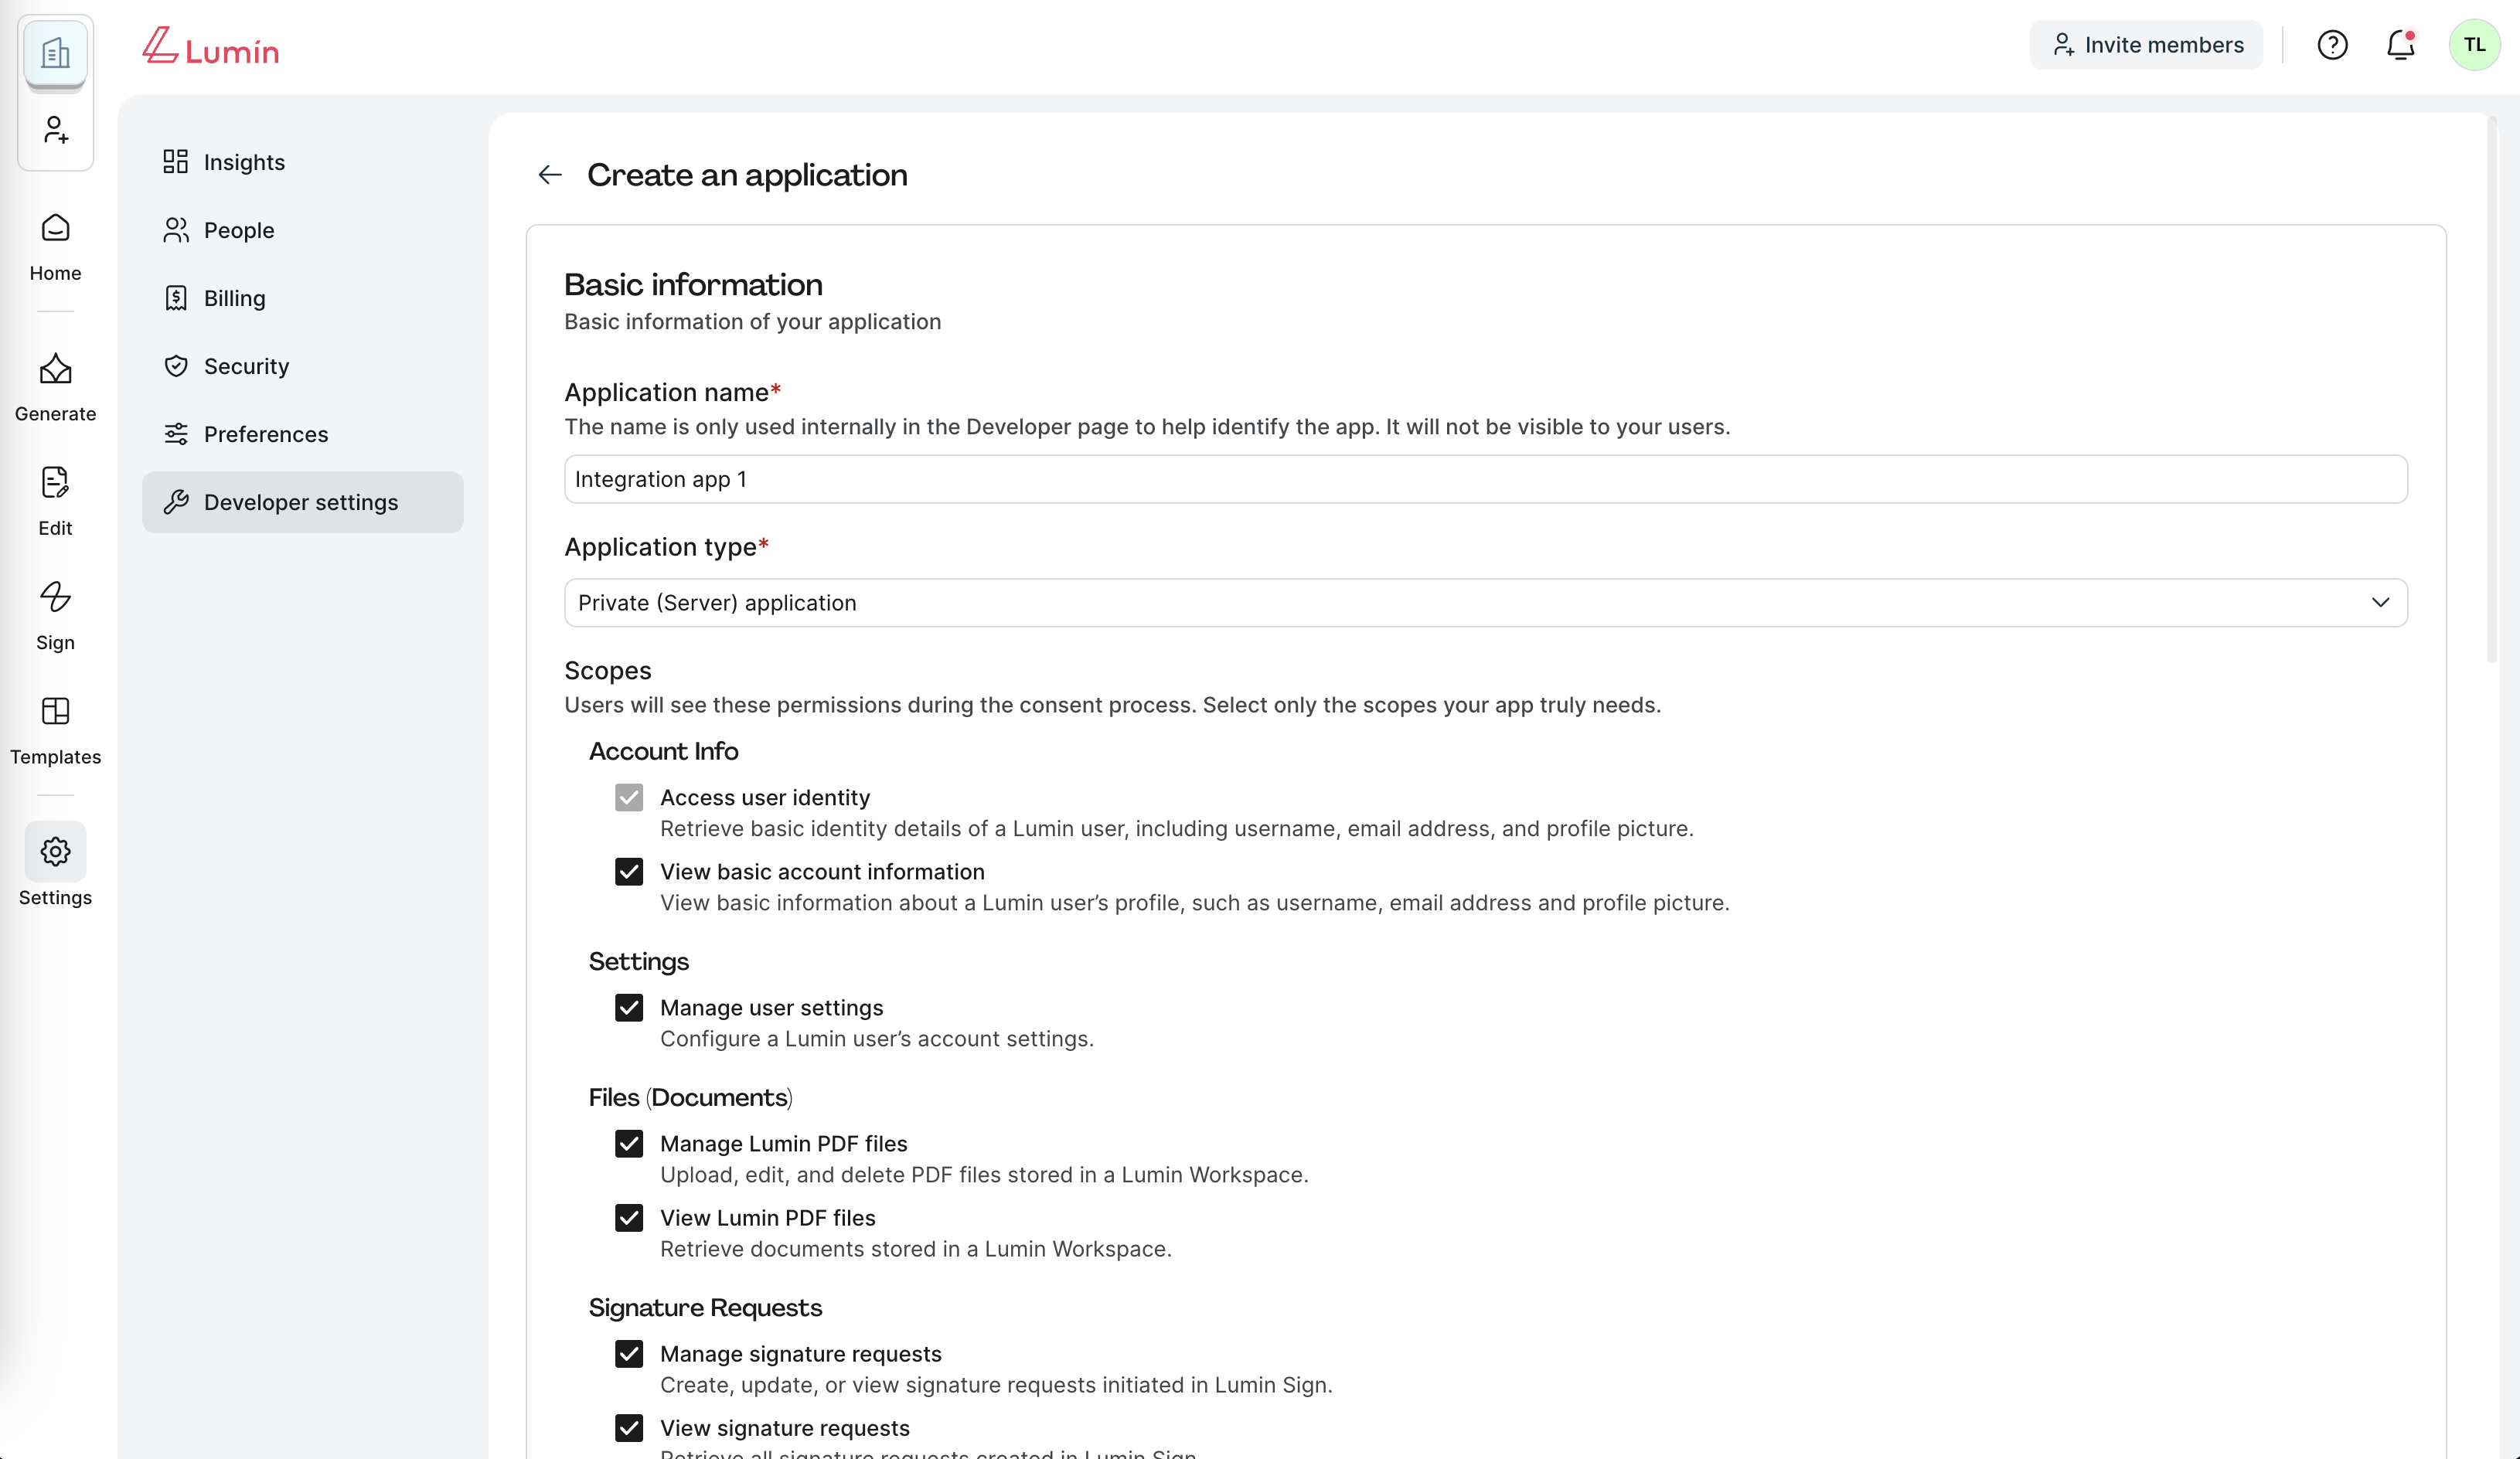
Note: Once you create an application, its type cannot be changed. If you need a different type, you must create a new application.
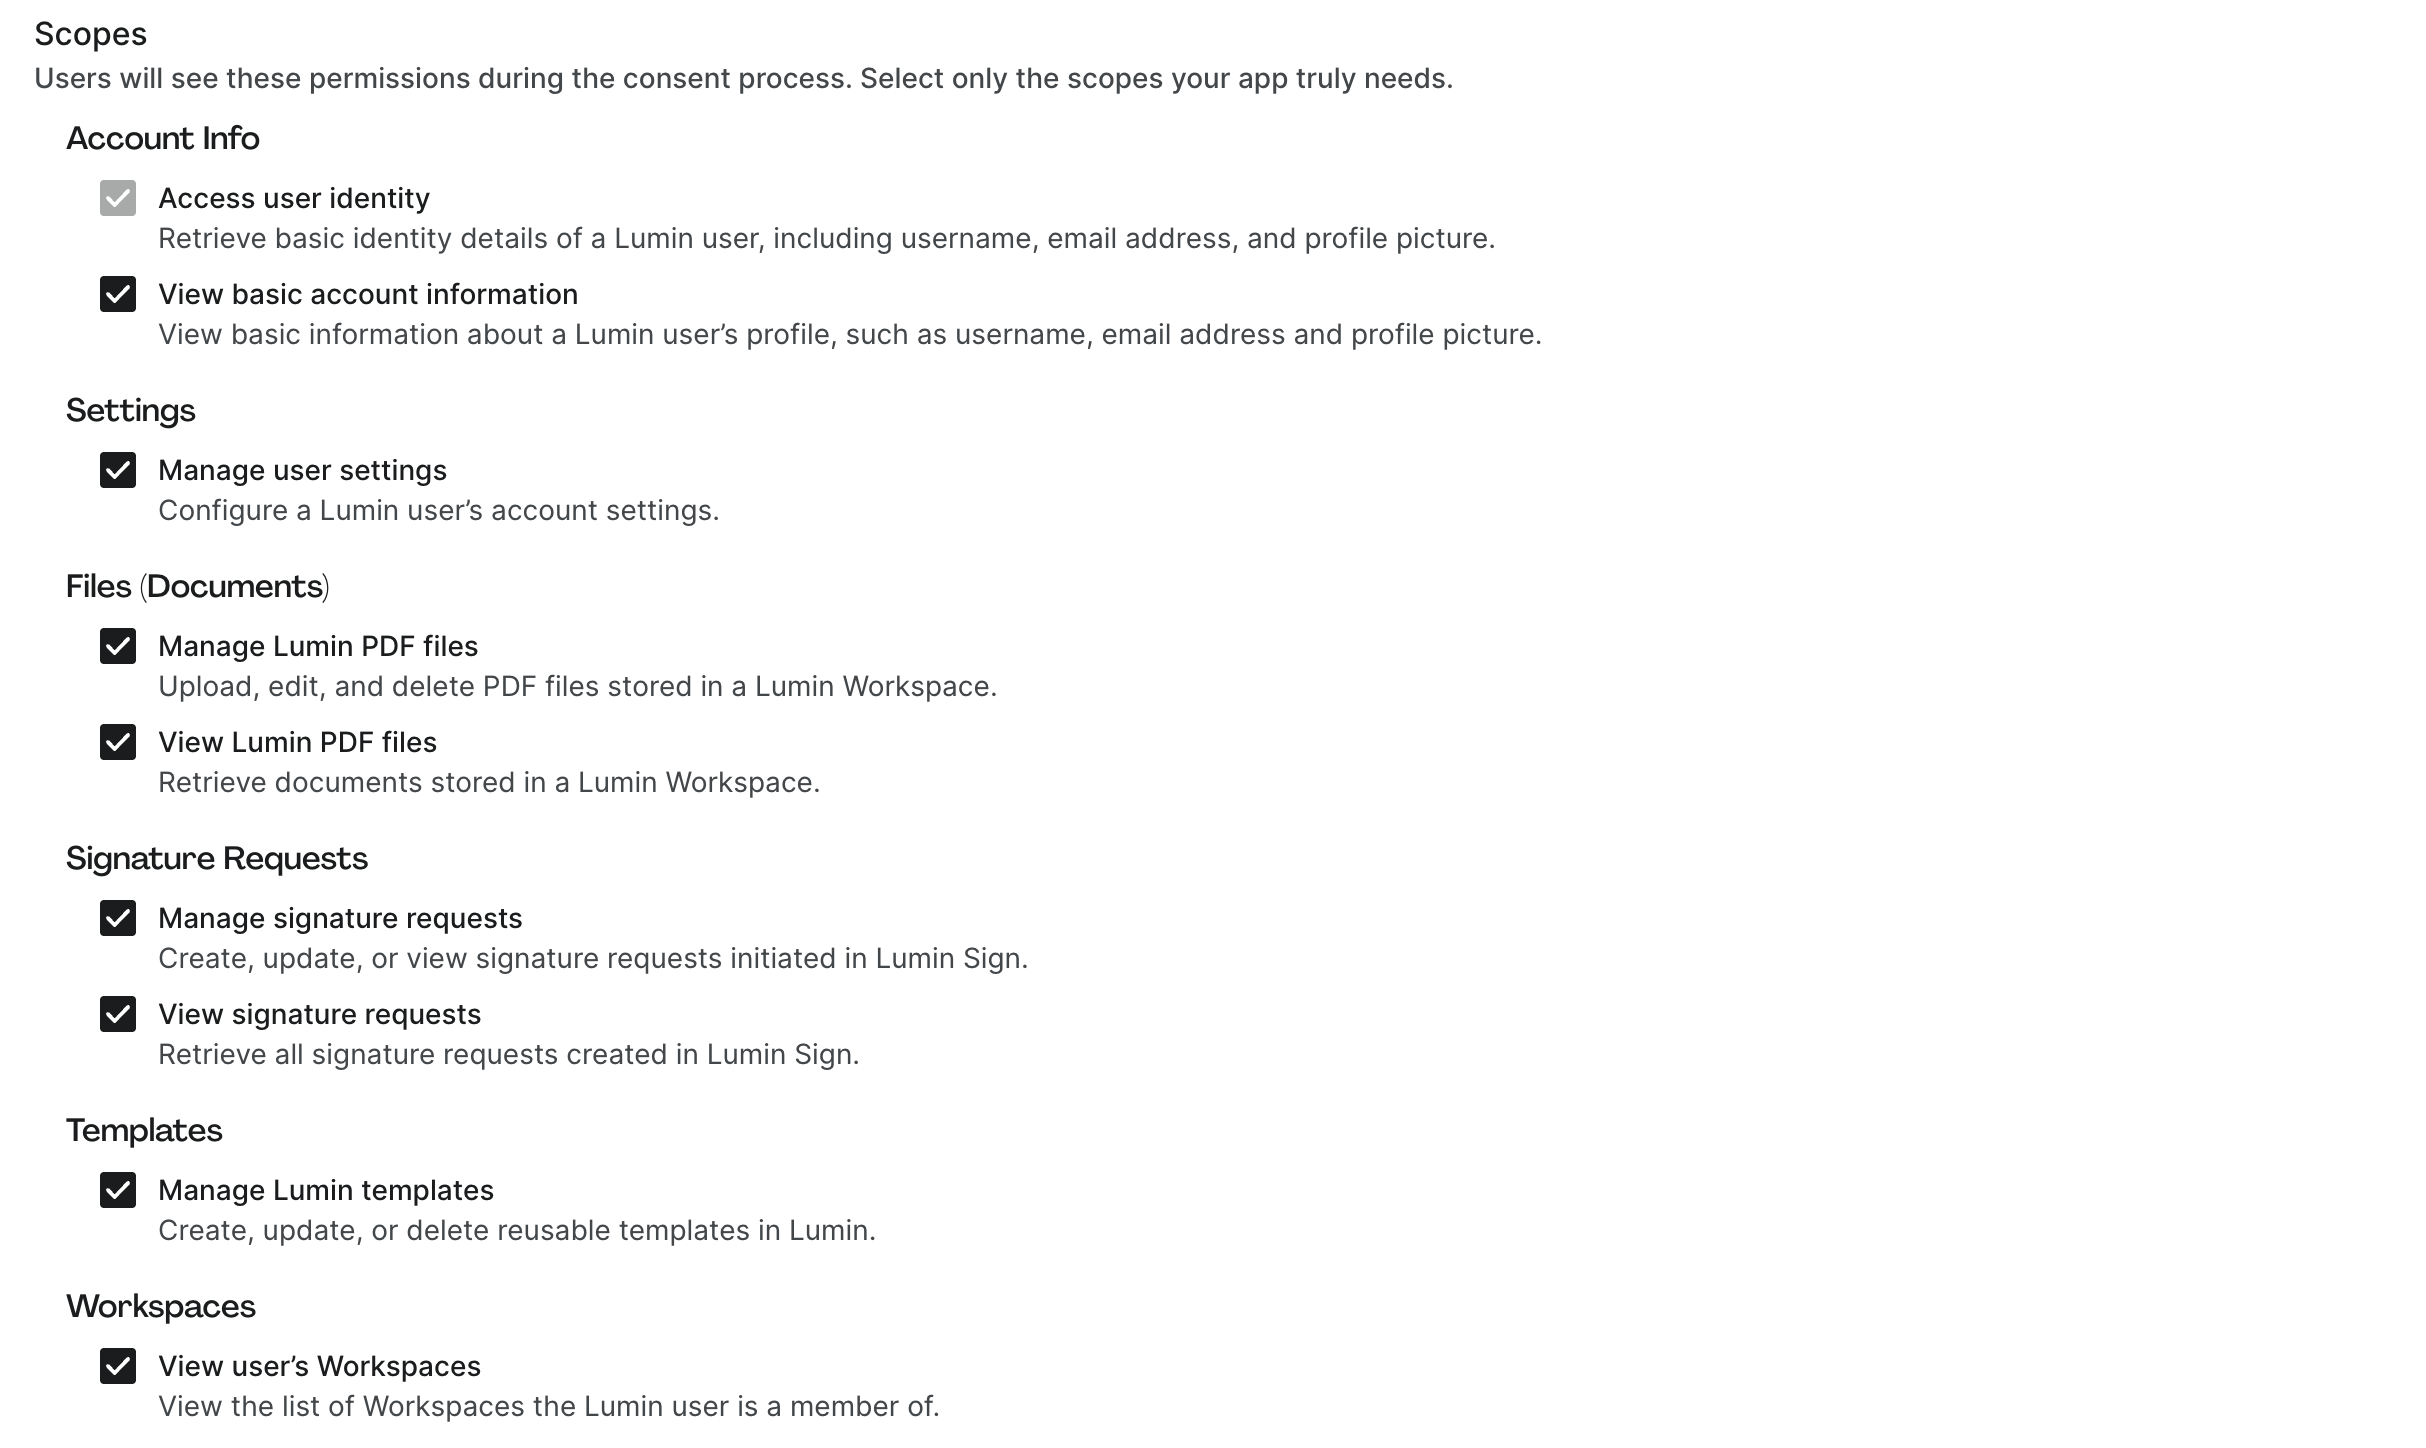
Step 3: Select scopes
Scopes define what data and features your app can access.
- Choose only the scopes your app requires (e.g., User profile, Workspaces, Templates, Signature requests).
- Scopes selected here will appear on the consent screen when users authorize your application.
For the full list and descriptions, see: OAuth 2.0 Scopes in Lumin
Step 4: Configure Redirect URIs
Enter one or more redirect URIs where Lumin will send users after authorization.
Requirements:
- Must use
https://or an app-specific scheme (e.g.,myapp://callback). - No wildcards, IP addresses, or relative paths are allowed.
- You can add multiple URIs by separating them with commas.
Step 5: Configure Consent screen
Fill out the information that users will see when granting your app permissions:
- App logo (JPG/PNG, max 3 MB)
- Website URL
- Privacy Policy URL
- Terms of Use URL
- Contact email (support or integration contact point)
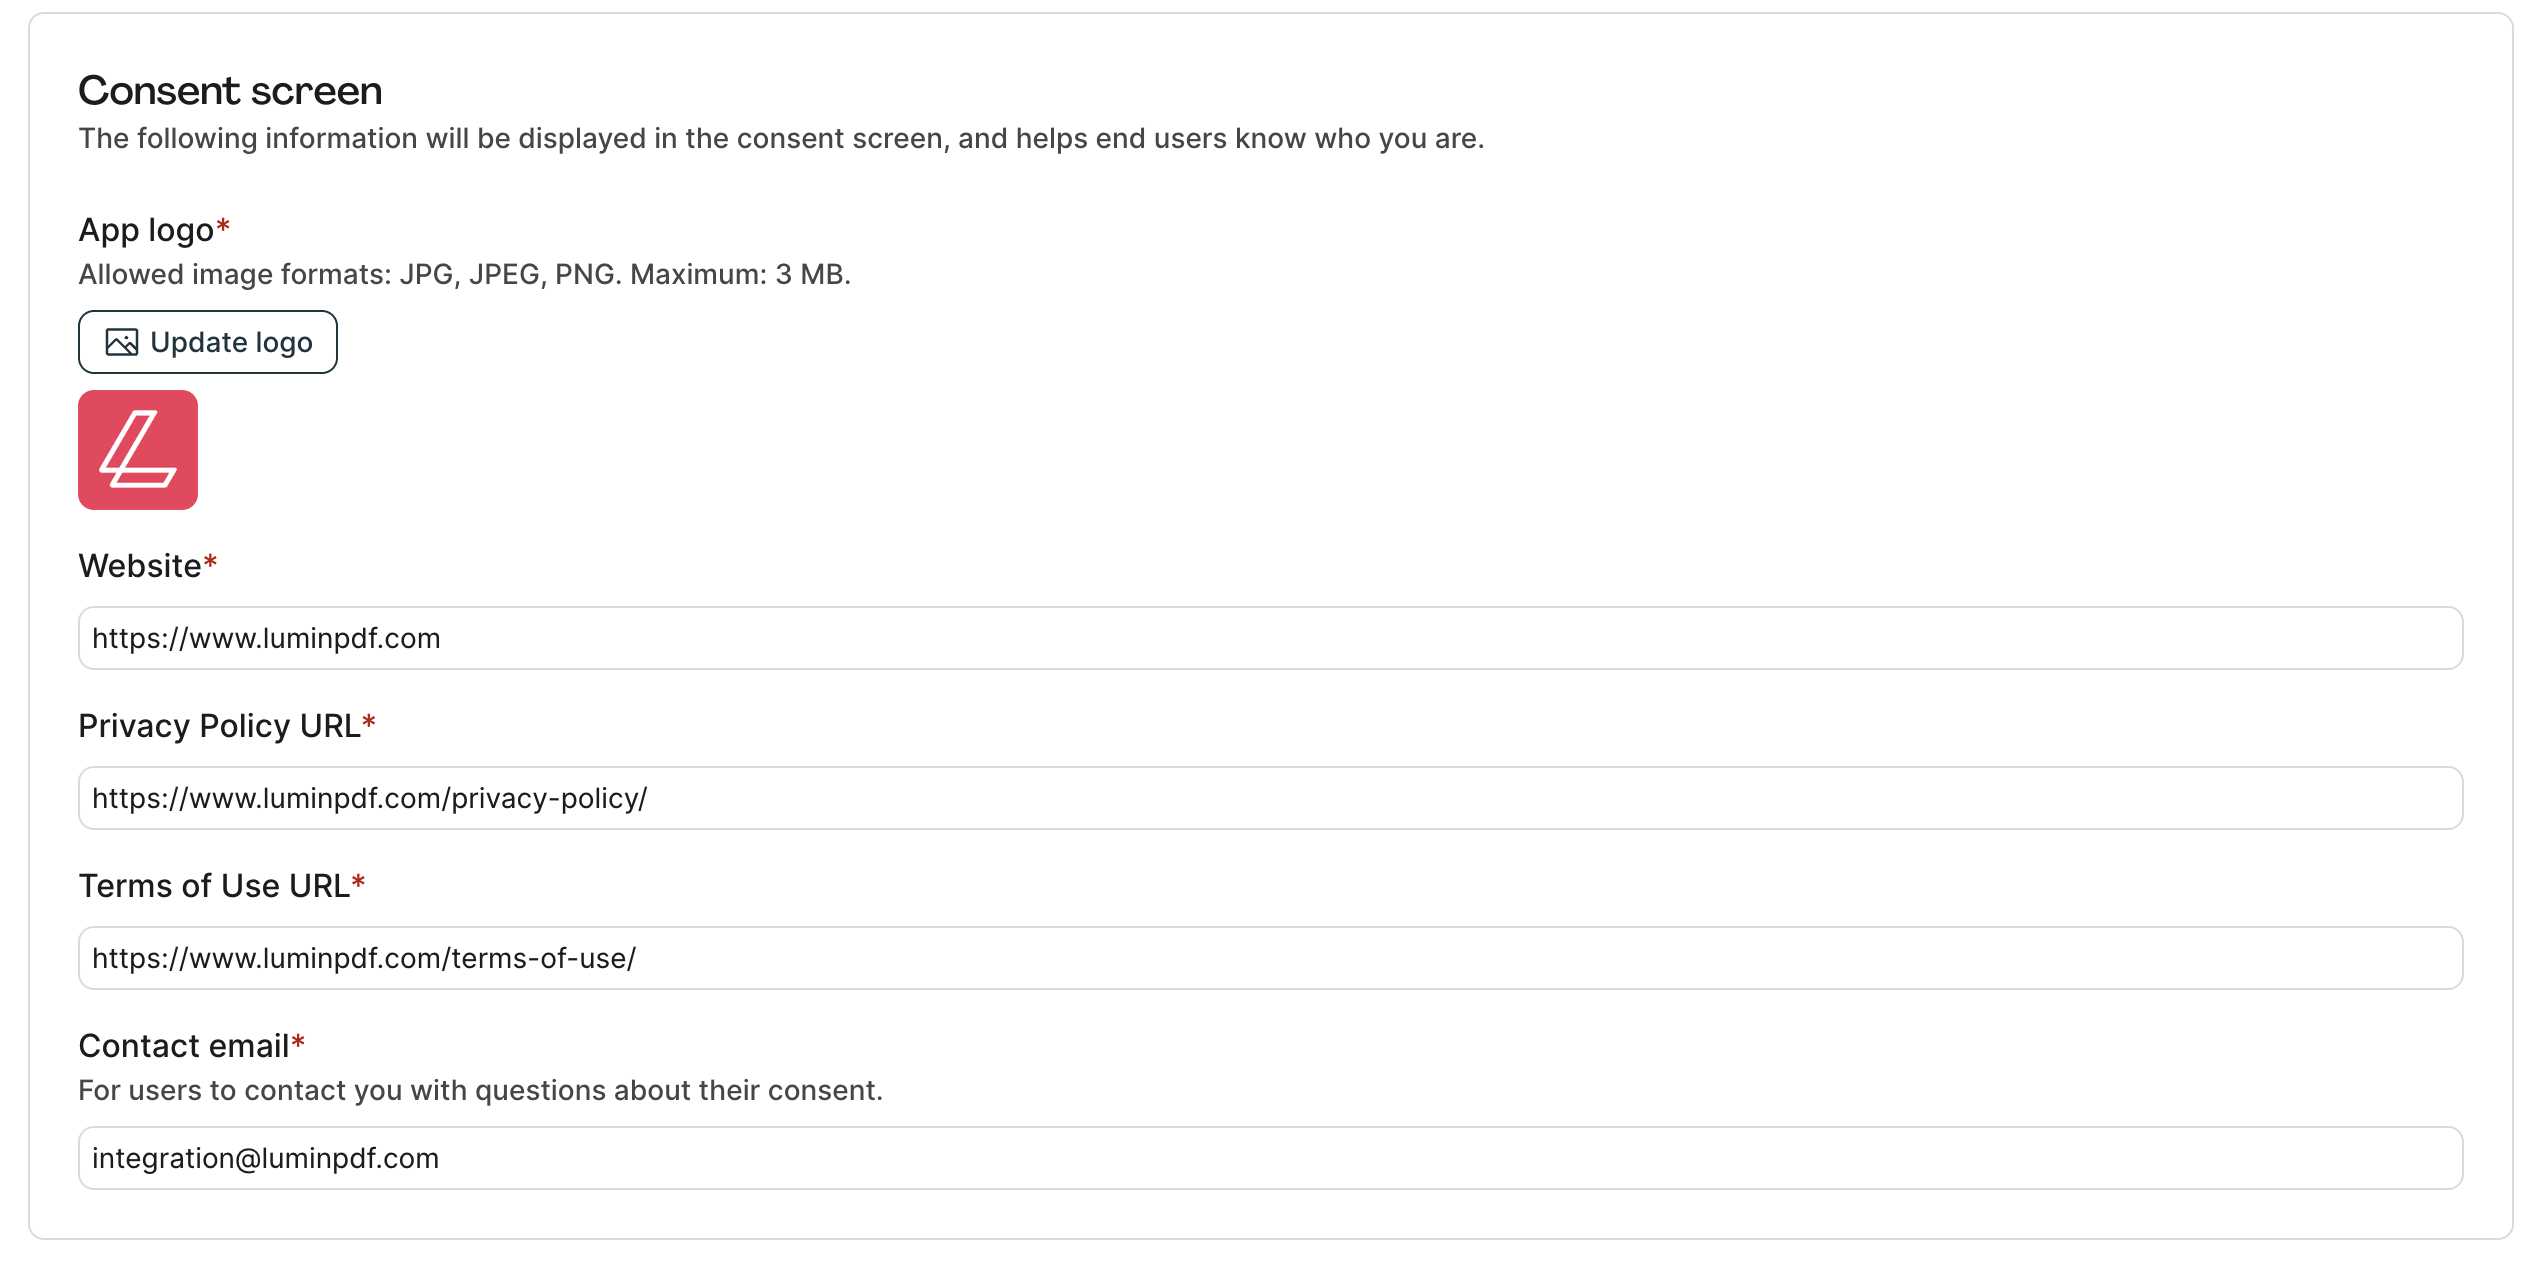
This ensures users know who is requesting access and how to contact you.
Step 6: Configure App webhook (optional)
If you want to receive events from Lumin on behalf of users, you can configure an App webhook.
- App webhook URL: The URL where Lumin will send events to your app.

For more details, see: App webhooks
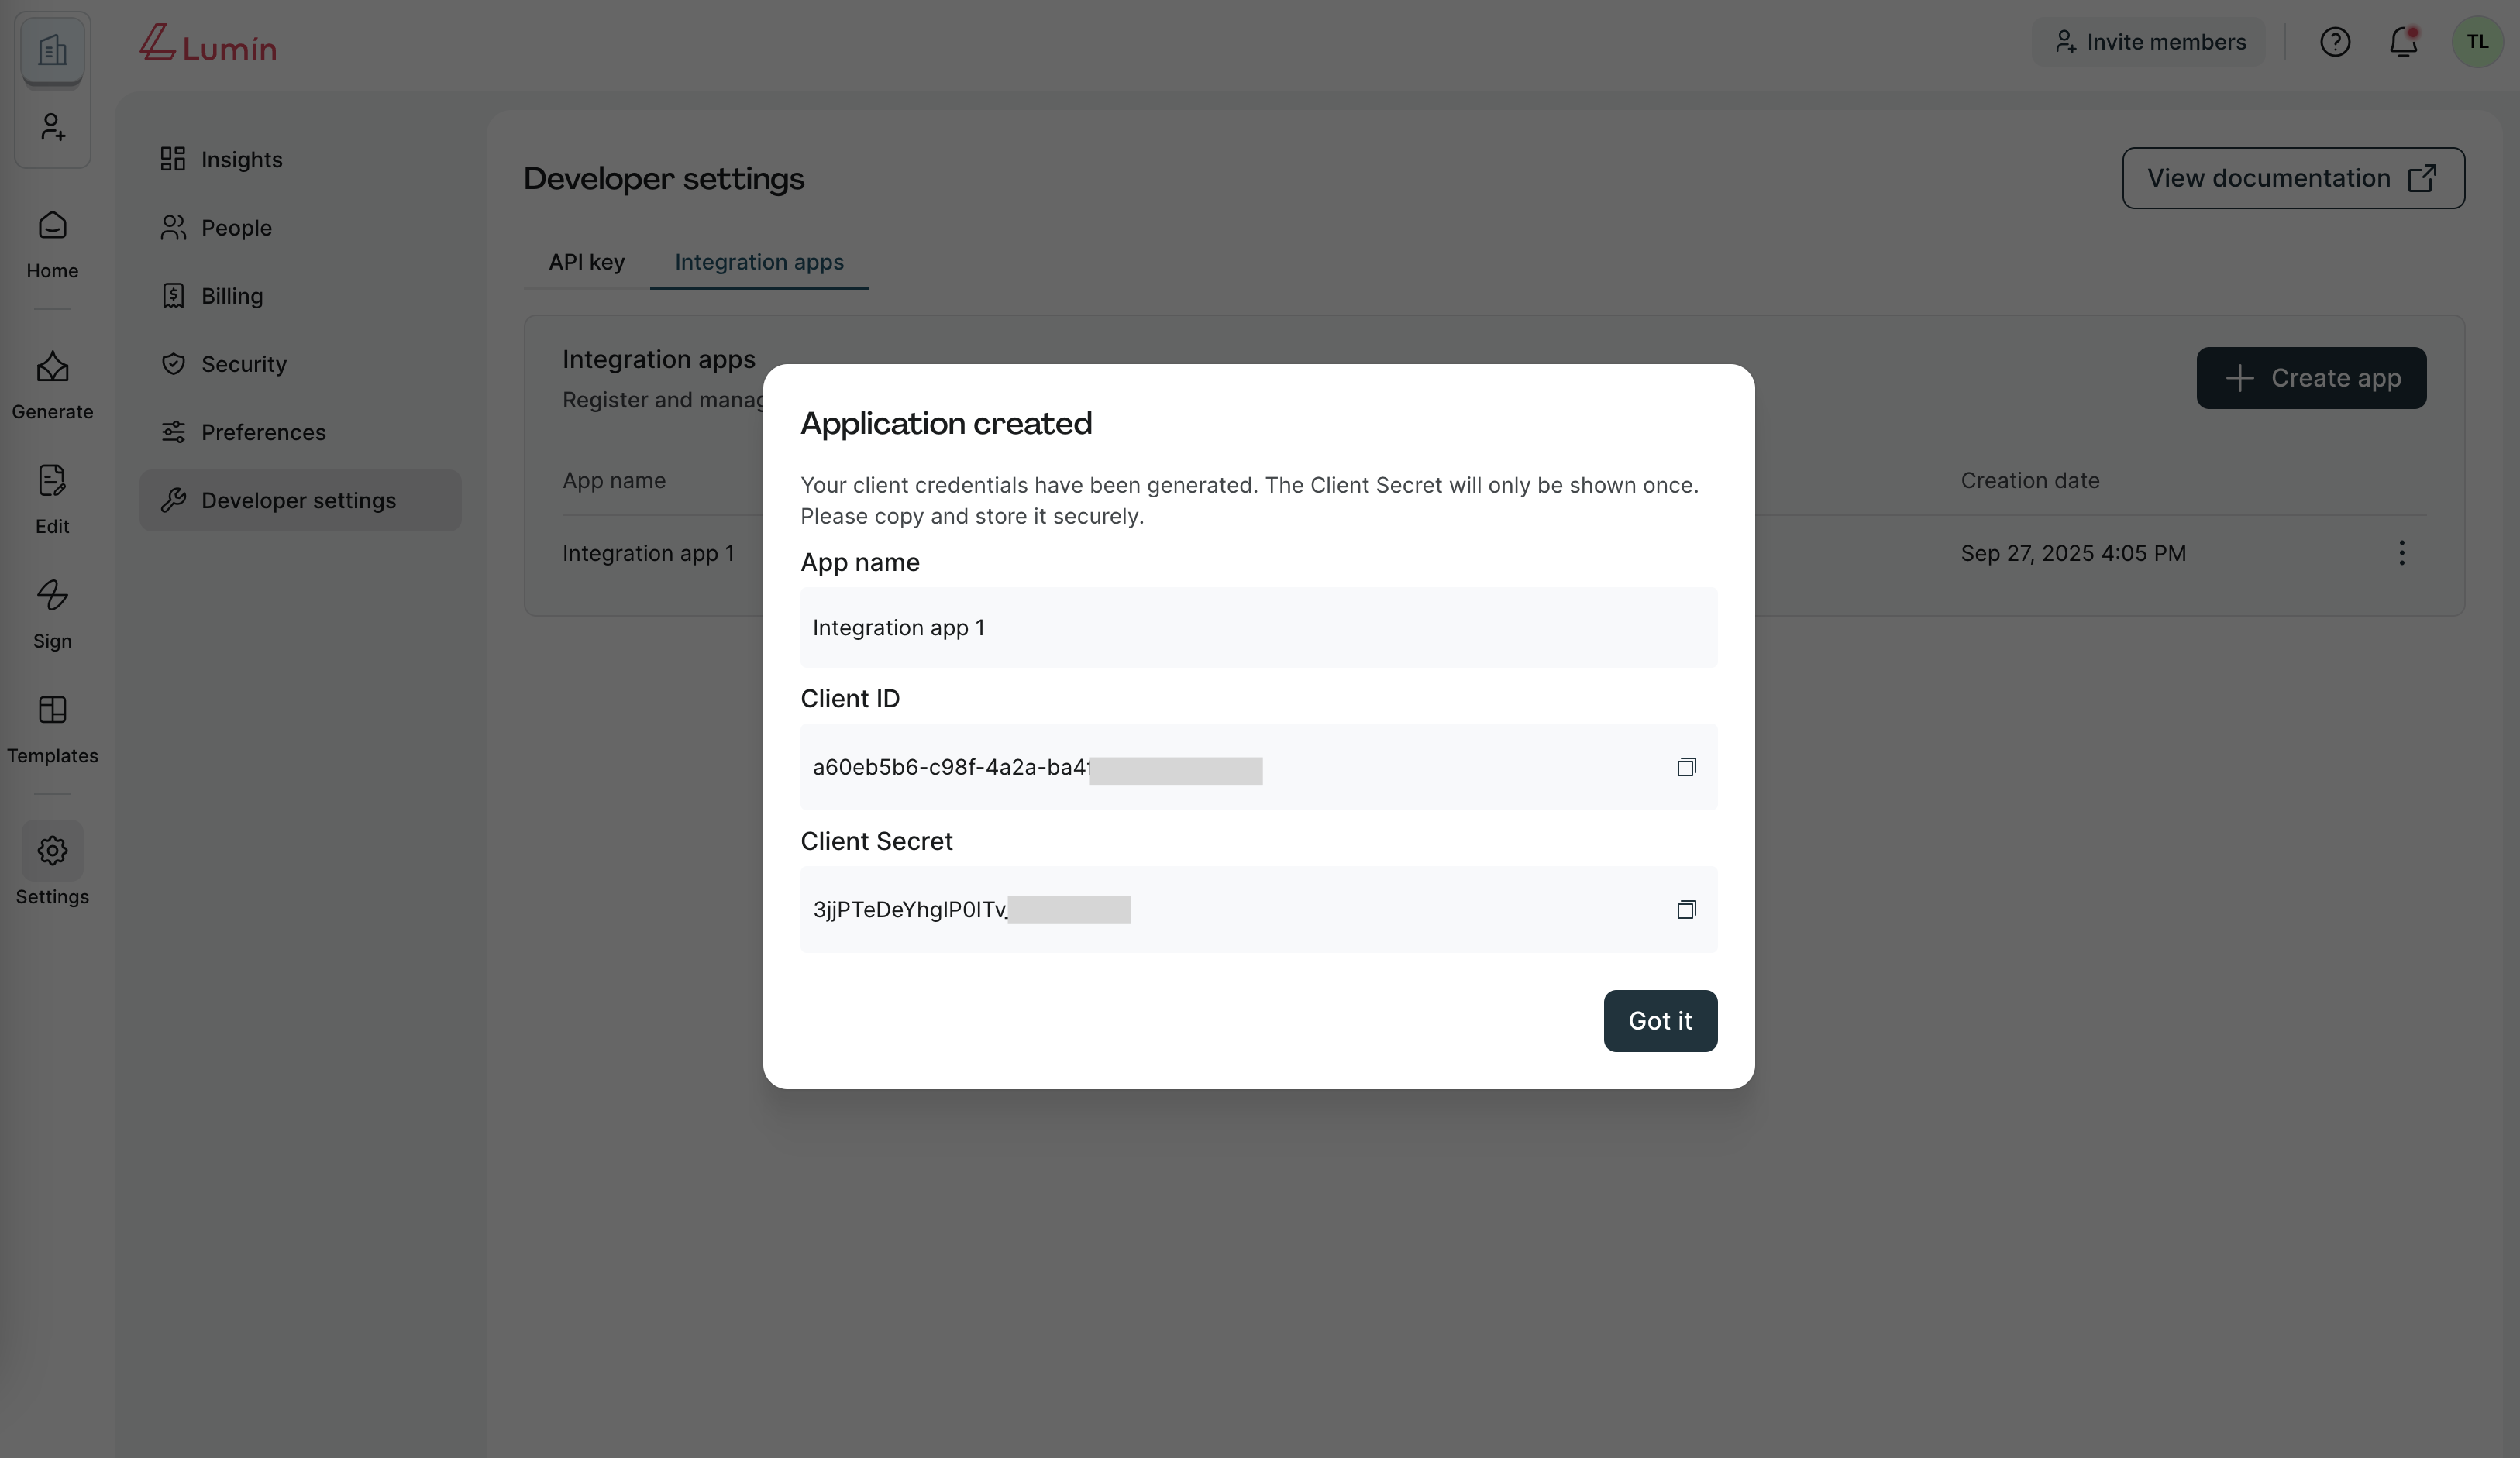
Step 6: Save and retrieve credentials
- Click Create.
- After application creation, you'll receive the following credentials:
- Client ID — Required for all OAuth 2.0 flows.
- Client Secret — Issued only for confidential (server-based) apps. Used when exchanging authorization codes and refresh tokens.
- Store these credentials securely in a secret manager. Do not hardcode them into your source code or commit them to repositories.
That's it — you've successfully created your first OAuth 2.0 application in Lumin.
Next steps
Use your credentials to implement one of the supported OAuth 2.0 flows:
- Private Authorization Code Grant — for confidential clients.
- Public Authorization Code Grant with PKCE — for public clients.